We understand that many models and agencies want to independently drive traffic from our ad network to their profiles, but struggle with how to do so. That’s why we have prepared this guide to help you easily start working with the popunder format and attract new paying fans to OnlyFans at a low cost.
In this guide, we will explain how popunder works, what settings to pay attention to before launching an advertising campaign, and how to optimize it.
What is a Popunder and how does it work?
Popunder is an ad that opens in a new tab when clicked anywhere on the screen. Users will have to pay attention to it to learn more or close the page.
In HilltopAds, popunder appears to visitors of free non-mainstream tube sites. This is the target audience for promoting your OnlyFans profile, but there are certain factors you need to know before getting started in order to effectively utilize your budget.
Registration, creating an ad campaign and setup
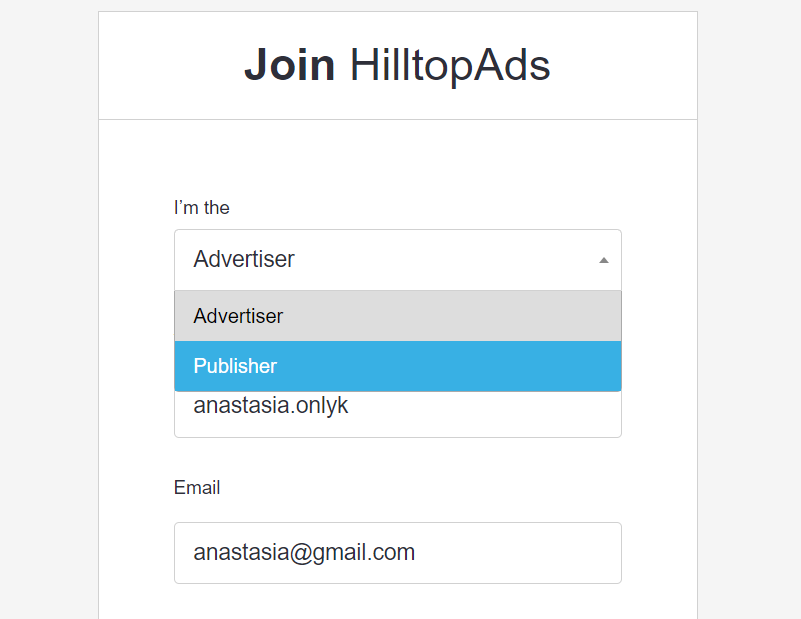
To launch your first advertising campaign, you need to register. Go here and click “Sign up”. In the first window, choose “Advertiser”, enter any nickname, email, and create a password:
If our website doesn’t open, add it to AdBlock exceptions. Don’t forget to confirm your registration through the email and fill out your profile to start working in the “My account” tab:

Creating an ad campaign
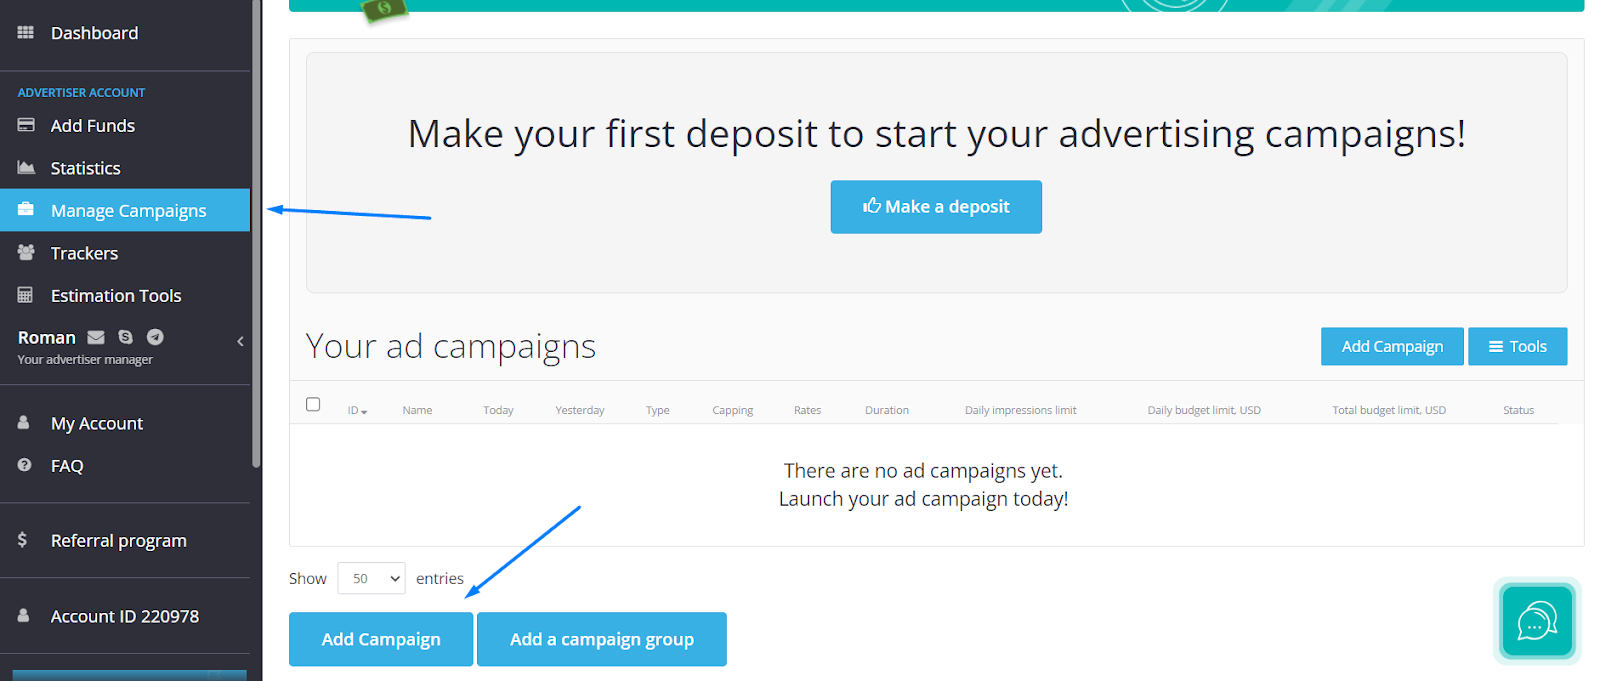
After registration, you can proceed to setting up and creating an advertising campaign. To do this, go to the “Manage Campaigns” tab, and then click on the “Add campaign” button:
We have many advertising formats, but if you are launching a popunder, you will only need two of them: popunder desktop and popunder mobile, which are highlighted in blue in the screenshot:
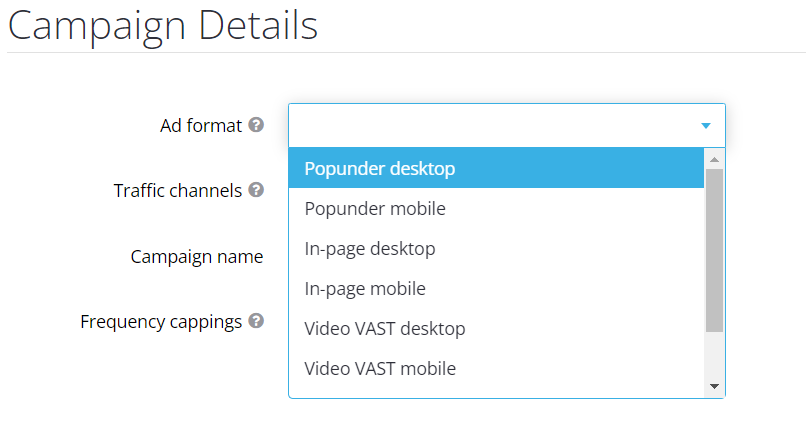
In the first case, the ads will only be shown to users who visit the site from a laptop or PC, and in the second case, from smartphones. Recent tests have shown that the second option is better suited for OnlyFans, but you can also test others as results may vary.
Next, in “Traffic Channels”, we select “Non-Mainstream” as it implies an audience of 18+, which is what we need:

Each traffic segment has its own activity level: high, medium, and low. This indicates the priority of displaying ads compared to other users: high activity will cost more, but it will be easier to work with, while low activity will be cheaper, but more effort will be required for successful results:
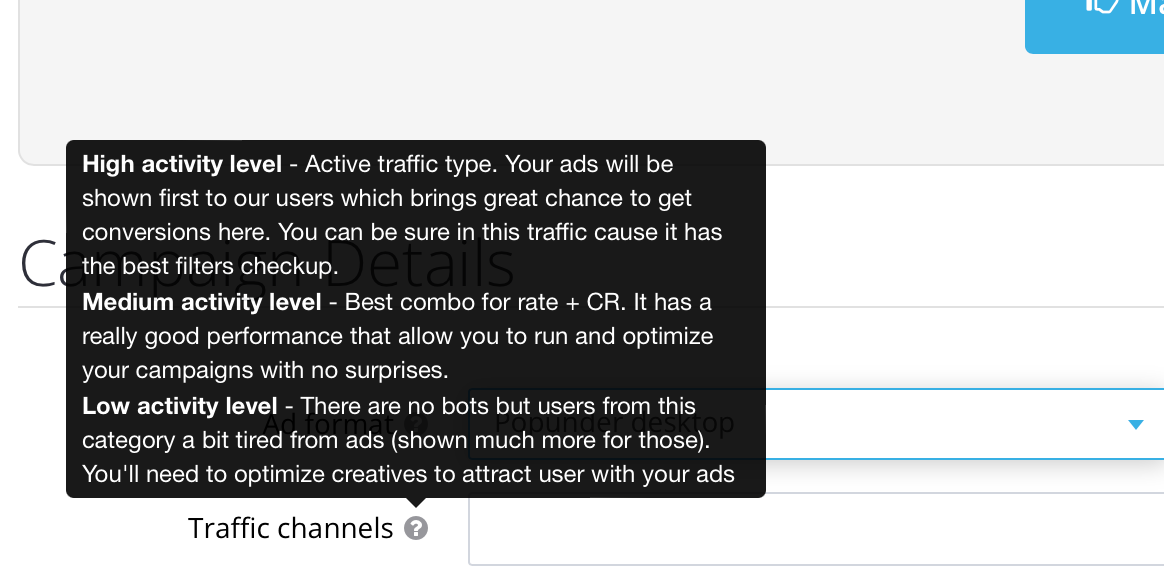
We do not recommend starting with low activity audiences because users there have difficulty perceiving ads and do not respond well to them. Users in high activity will see the ads for the first time and the response rate will be higher.
After that, come up with a convenient name for your campaign, which will only be visible to you, and insert the landing page link:
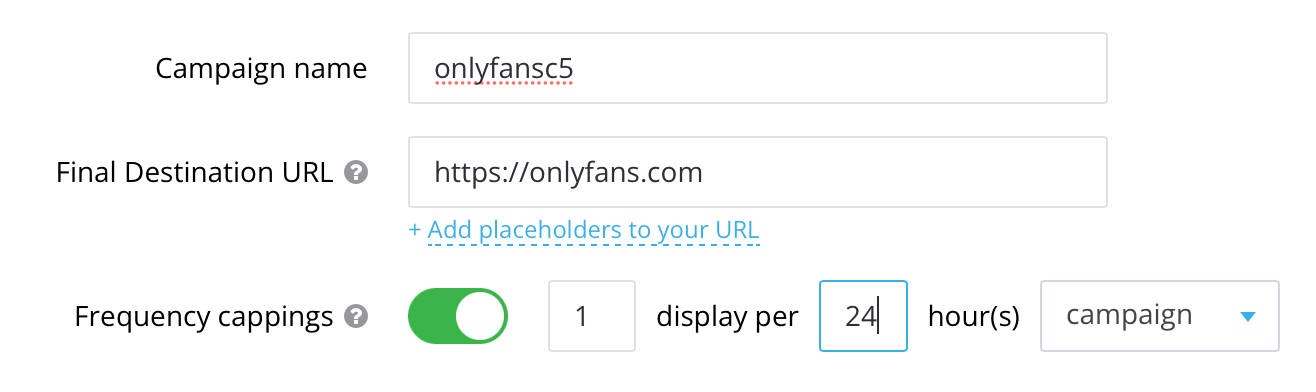
You can insert a link directly to the model’s OnlyFans page or use a warming up stage: a pre-landing page or the model’s social network profile. It is important to remember that if you direct traffic directly to the free trial link, the user will not see the model’s page itself, but only a popup window that offers to subscribe to the model:

Due to the nature of OnlyFans’ operation, users who do not have an account or a linked bank card are unlikely to want to subscribe if they do not know what the model looks like. This means that the format of driving traffic directly to the link will only be effective for active OnlyFans users. In this case, the cost per fan will be lower.
Alternatively, you can use a warming up pre-landing page – an intermediate placeholder site that the user sees before reaching the landing page. For example, the user will see a page with photos or videos of the model and a button below urging them to subscribe to her premium account for 2 weeks. This can motivate users without an account to register, link their card, and subscribe. In this case, the cost per fan will be higher.
There are other options for connections, for example, warming up the model through social media. In this case, one of the social media platforms can be specified as a landing page, such as Instagram, Reddit, or others. Users will initially warm up with posts or direct messaging and then may transition to OnlyFans.
You can test and combine different campaign settings to achieve different results in the end.
Targeting settings
Targeting settings allow you to select an audience for displaying ads that will interact with it most effectively.
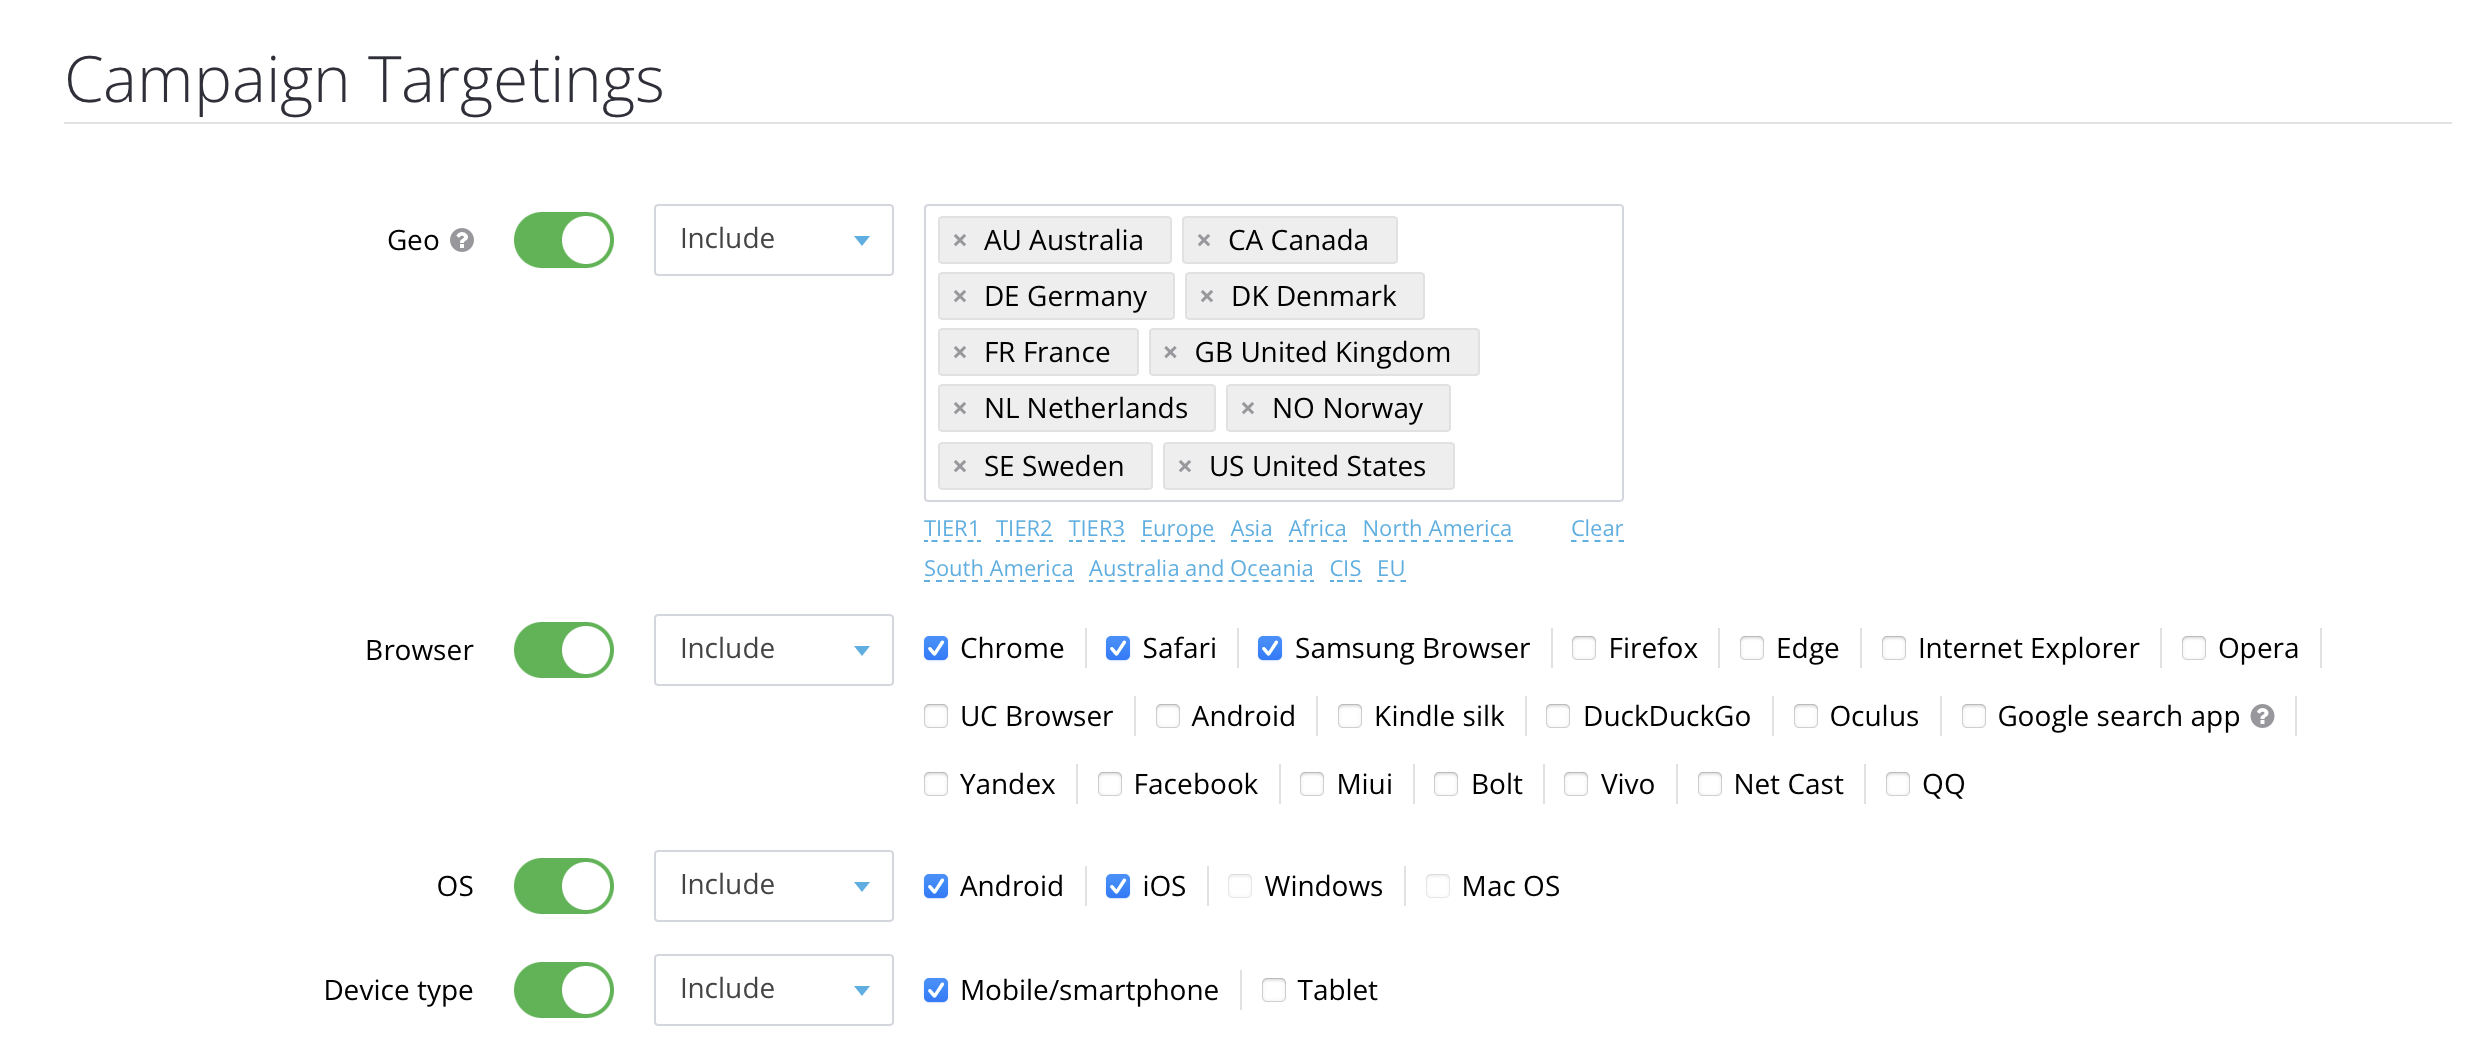
First, choose the countries where the promotion will be shown. For OnlyFans, the most relevant geos are Tier-1 countries with high purchasing power, such as the USA, Canada, European countries, Australia, and others.
You can select the most popular browsers or test local ones. Choose Android and iOS as operating systems if you want the ads to be shown to smartphone users. To include tablet users in the targeting, select Mobile and Tablet.
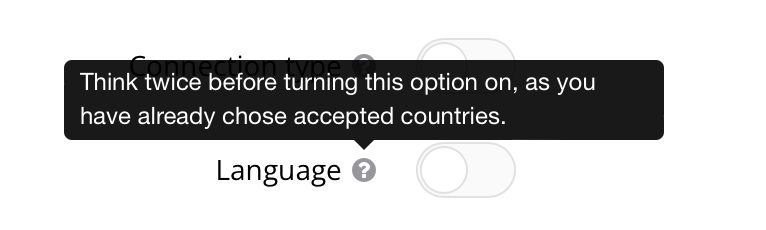
It is recommended to leave the language setting untouched unless there is a specific goal to target a particular language group in a country. If you plan to reach all residents of a country, we recommend not enabling this parameter.
When choosing device versions, give preference to the latest versions:
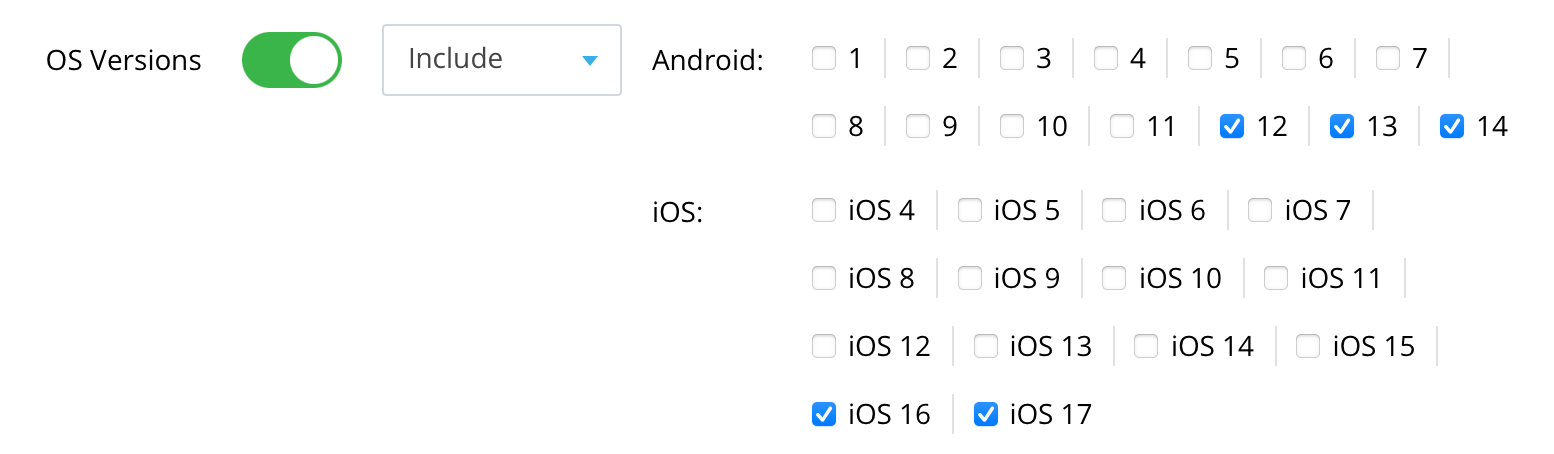
Additionally, you can select the device brand and target the ads only to iPhone or Android owners.
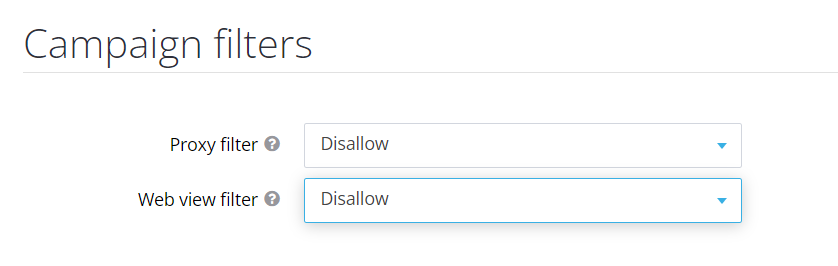
Another important setting is to prohibit proxies. This means that your ads will not be shown to users with a substituted IP, as they are not genuine residents of the country:
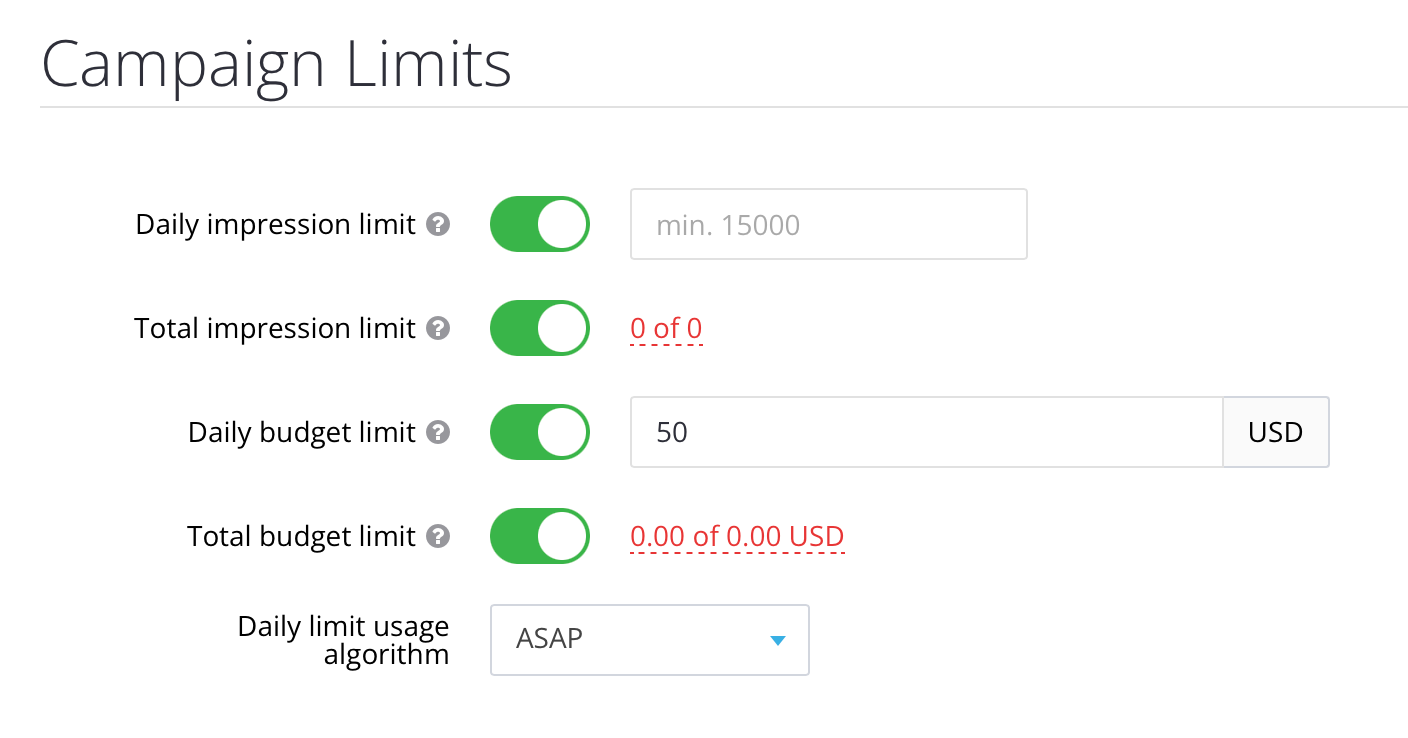
You can also set limits based on your daily and total advertising budgets, but the daily limit should not be less than $20:
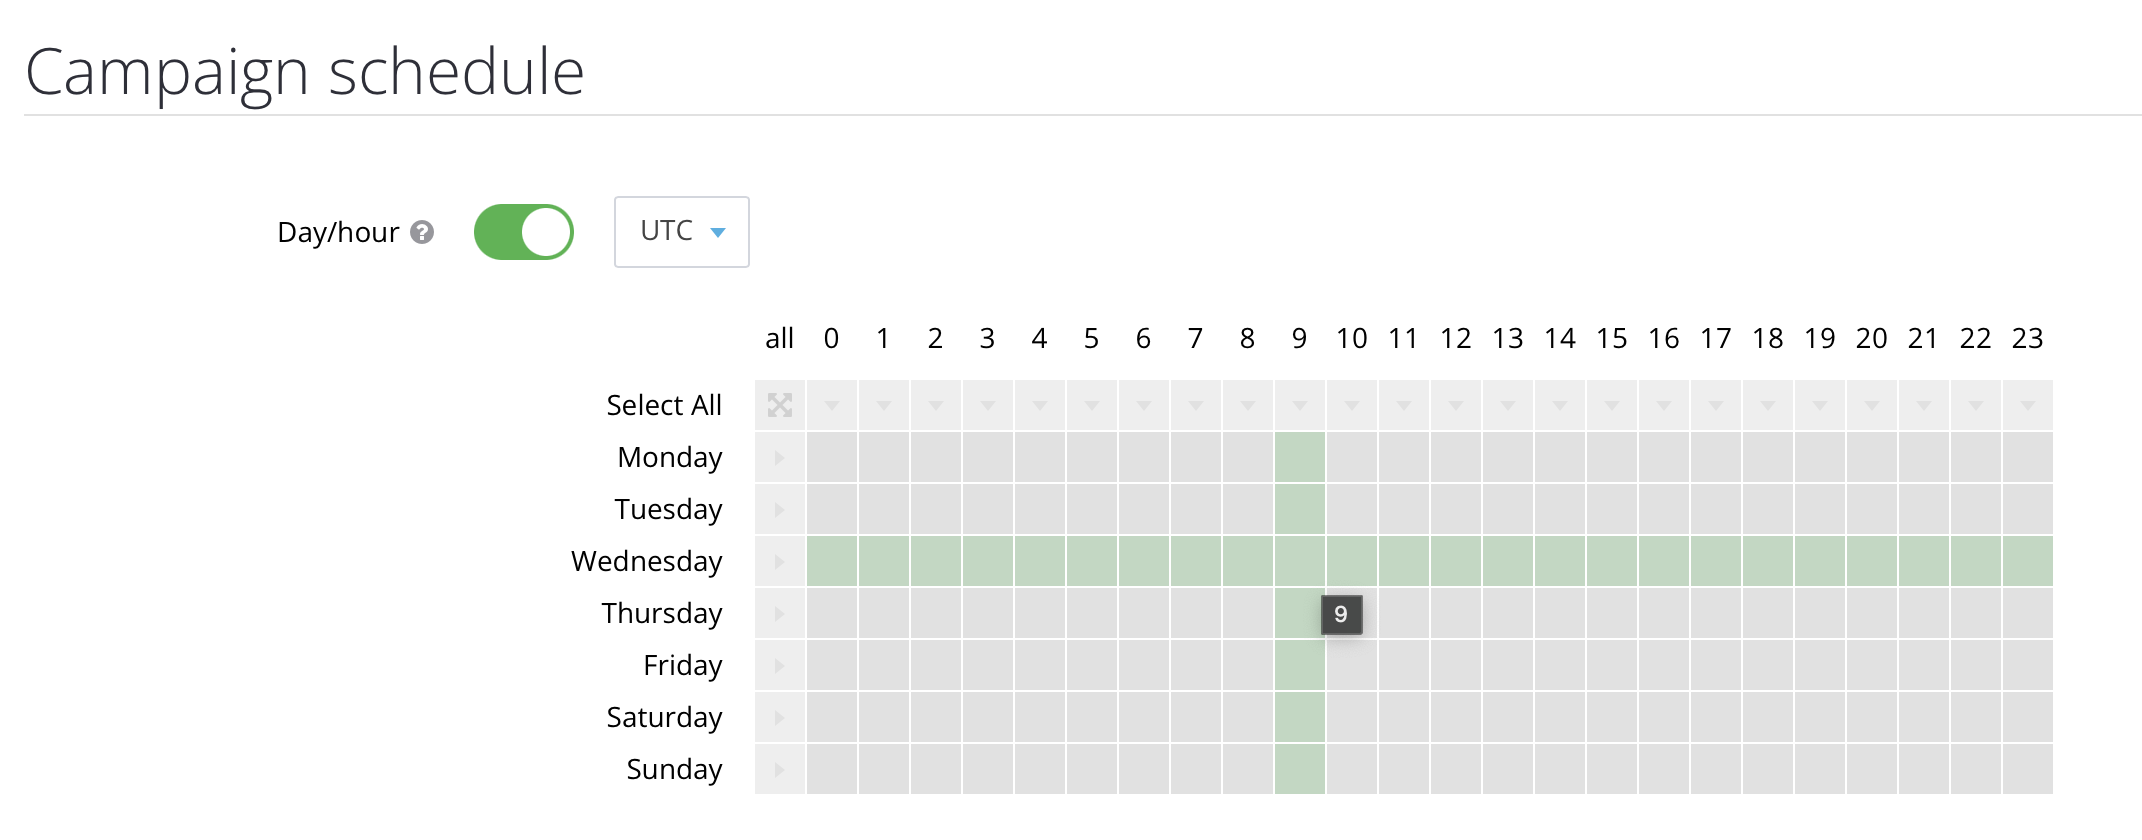
In addition to these settings, you can configure ad display on specific days and hours:
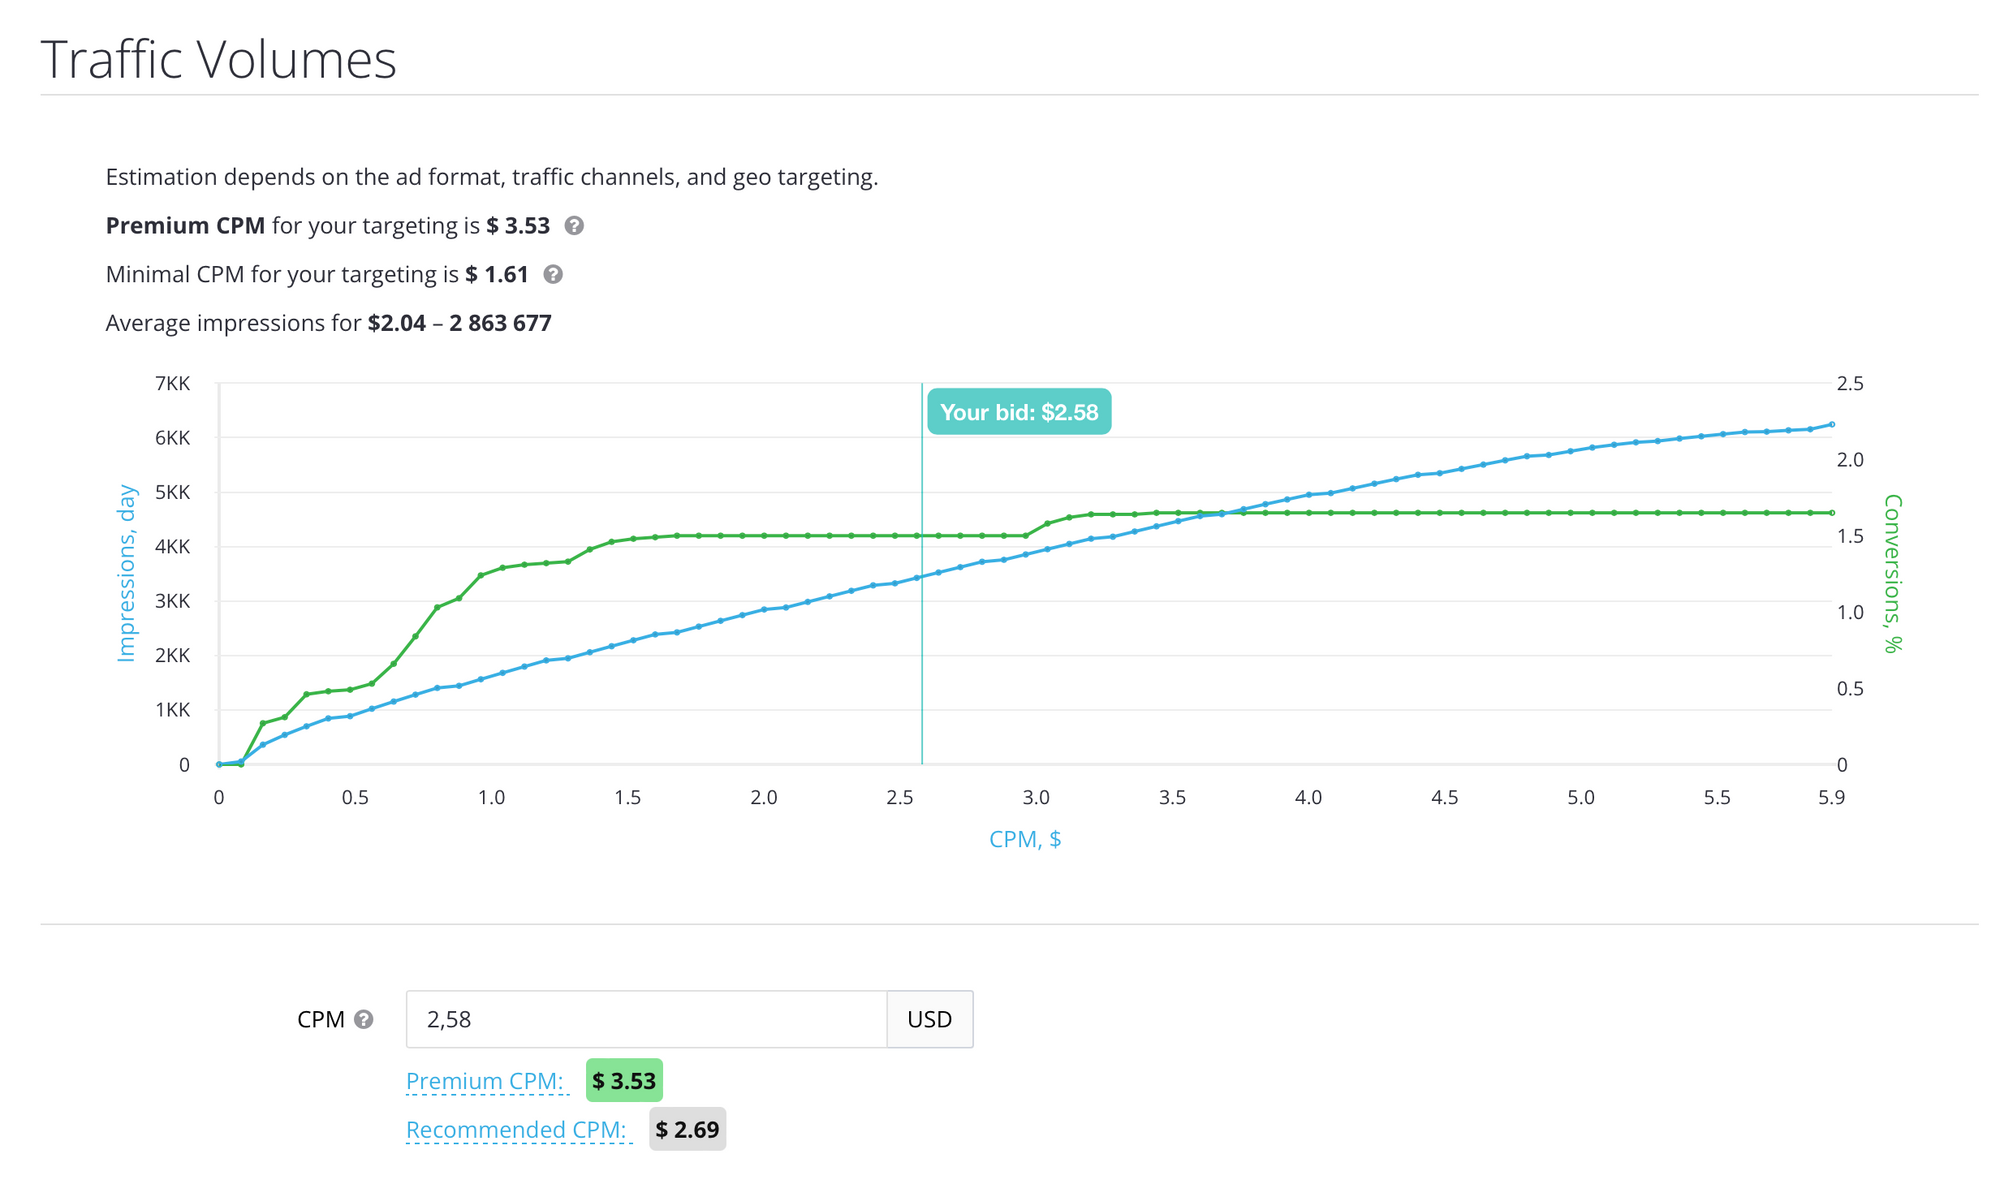
Once all the settings are completed, you can view the recommended and premium cost per thousand impressions:
Other targeting metrics can further enhance and refine your campaign, but these are the main settings. To launch the campaign, you need to fund your balance.
Balance replenishment
The balance section is located at the top of the dashboard, next to your account ID:

You can replenish your account balance using Visa and Mastercard credit cards, through payment systems like Wire Transfer, Paxum, Capitalist, or with cryptocurrency:
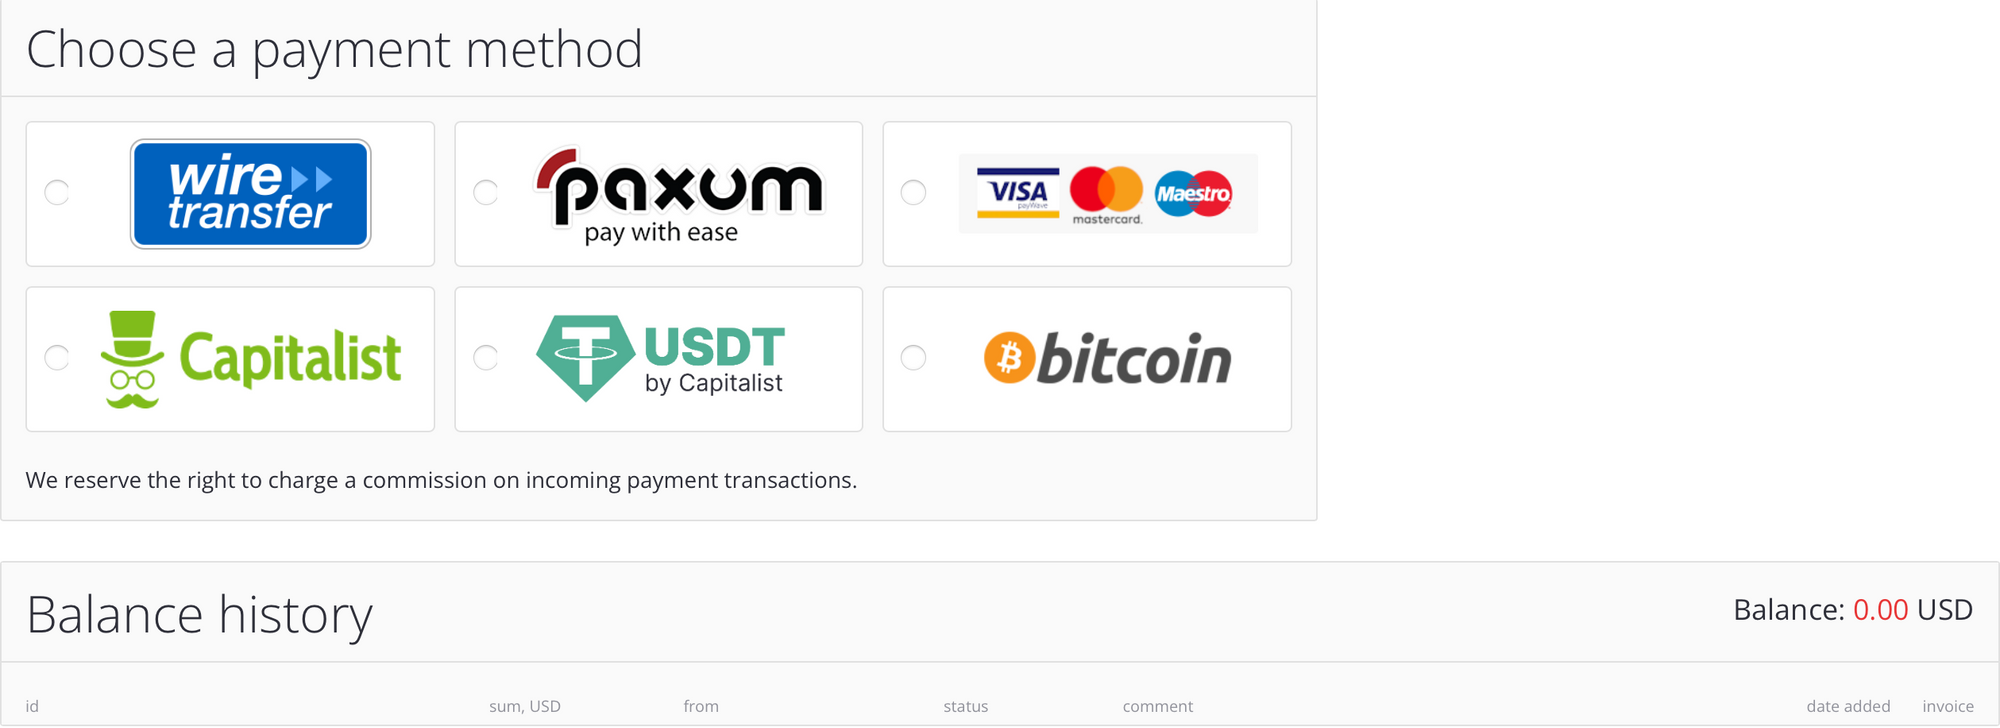
In this section, you can also view the details of all your replenishments.
Now that everything is ready, you can start your advertising campaign. This campaign will appear in the “Manage Campaigns” section, where you can view statistics and make changes. After confirming the campaign, you will need to wait a little until it passes moderation, and then the traffic will go to your OnlyFans page.
Conclusion
We have explained the basic settings and their values, but you can experiment based on your ideas, goals, and budgets. Results may vary between models, but there are some recommendations that are worth following when launching an advertising campaign for your OnlyFans profile:
- Make sure your page has good traffic processing with sexters;
- Your feed should not be filled with SFS from other models;
- Your page should have at least 30 original posts;
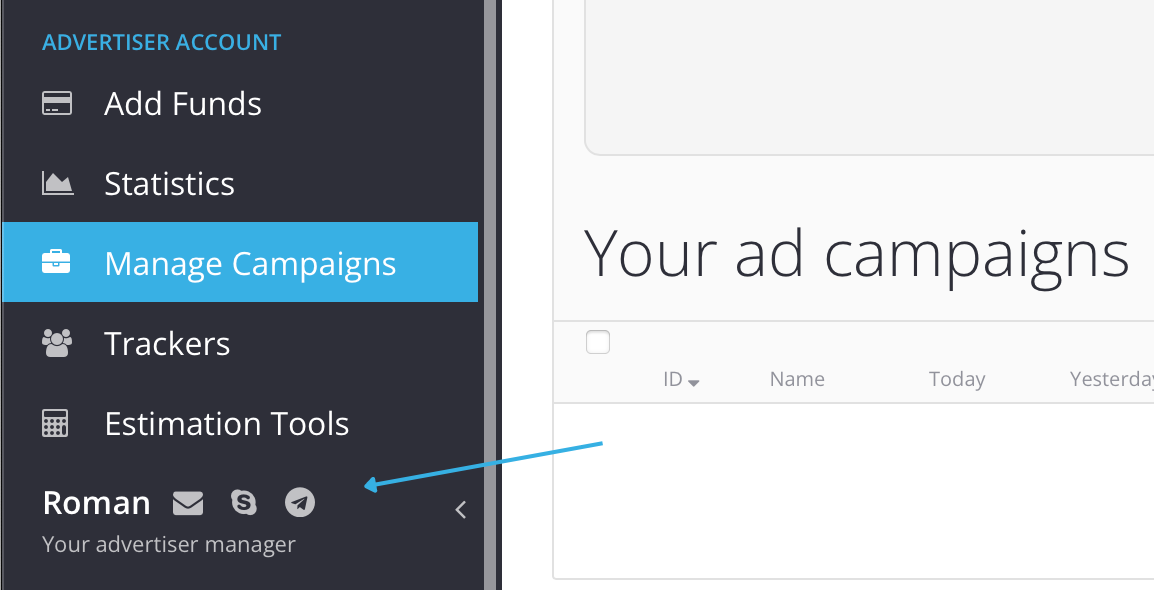
If you have any questions, you can always reach out to your manager and ask for assistance or guidance. Their contact information is provided on the left panel: