Finding the right tools can make or break an affiliate marketing strategy. Keitaro is a trusted choice for marketers who need advanced tracking, fast performance, and customizable routing options. When combined with HilltopAds, it becomes an even more powerful tool for boosting conversions and profits.
💰 Exclusive bonus from the Keitaro platform: Use promo code HILLTOPADS to get 20% off your first purchase. Offer valid until January 2026—don’t miss your chance to save and scale your campaigns effectively!
This guide walks you through the entire setup process, from licensing Keitaro to launching your first campaign with HilltopAds.
Setting Up Keitaro with HilltopAds
Step 1: Purchase a License
Before diving into campaign tracking, the first step is to acquire your Keitaro license. Follow these steps:
- Visit the Official Keitaro Website: Head over to keitaro.io and sign up for an account.
- Choose a License Plan: The starter license costs $49 and is perfect for beginners. If you’re managing higher traffic volumes, you can upgrade later as needed.
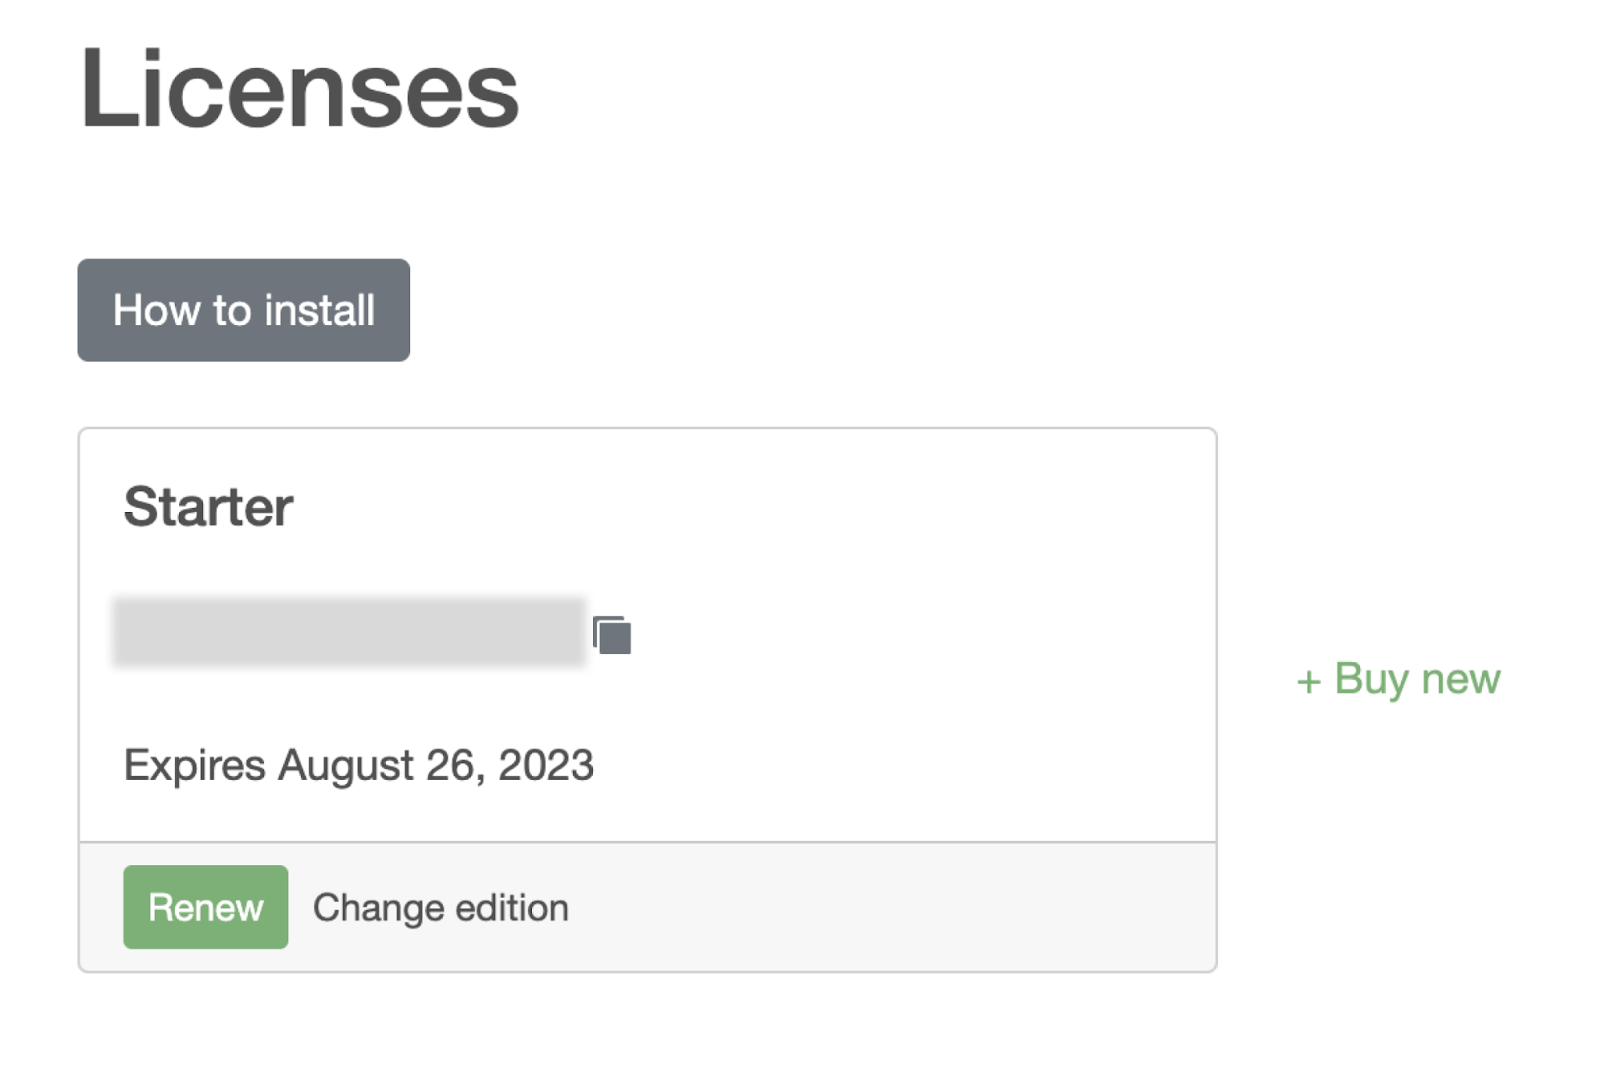
- Receive Your License Key: After completing your purchase, you’ll receive an email containing your license key. Keep this handy as you’ll need it during setup.
Step 2: Set Up a Server
Keitaro operates on a self-hosted server, giving you full control and flexibility. Here’s how to set it up:
Server Requirements:
Depending on your expected traffic volume, choose a server with the following specifications:
| Traffic Volume (Clicks per Day) | Type | RAM | CPU |
|---|---|---|---|
| < 10,000 | VPS | 2 GB | 1 CPU |
| 10,000 – 100,000 | VPS | 4 GB | 2 CPU |
| 100,000 – 500,000 | VPS | 8 GB | 4 CPU |
| 500,000 – 1,000,000 | VPS/VDS | 16 GB | 4 CPU |
| 1,000,000 – 5,000,000 | VDS | 32 GB | 4 CPU |
| 5,000,000 – 10,000,000 | VDS | 64 GB | 8 CPU |
Additional Requirements:
- Operating System: CentOS 9 Stream or CentOS 8 Stream.
- Virtualization: KVM.
- Disk Space: Minimum 20 GB SSD.
Quick Setup with FriendHosting
For an easier setup, consider using FriendHosting, a Keitaro partner with pre-configured servers. Follow these steps:
Complete the Purchase: After payment, you’ll receive an email with your server credentials and a link to access the Keitaro admin panel.
Visit FriendHosting and select a server package that suits your needs.
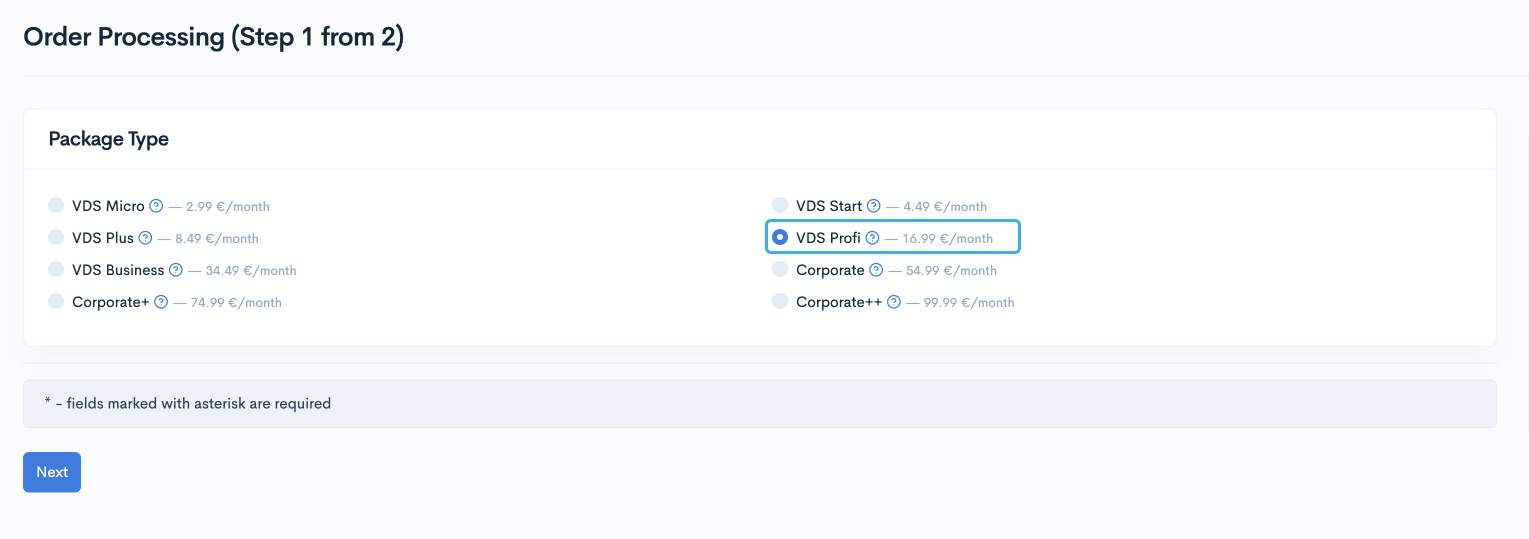
Here are the necessary server settings that you need to choose. The beauty of this option is that the Keitaro control panel already comes preinstalled with the server, and most of the work has been already done for you.

Step 3: Configuring Keitaro
- Log In: Use the link provided in the email to access the Keitaro admin panel.
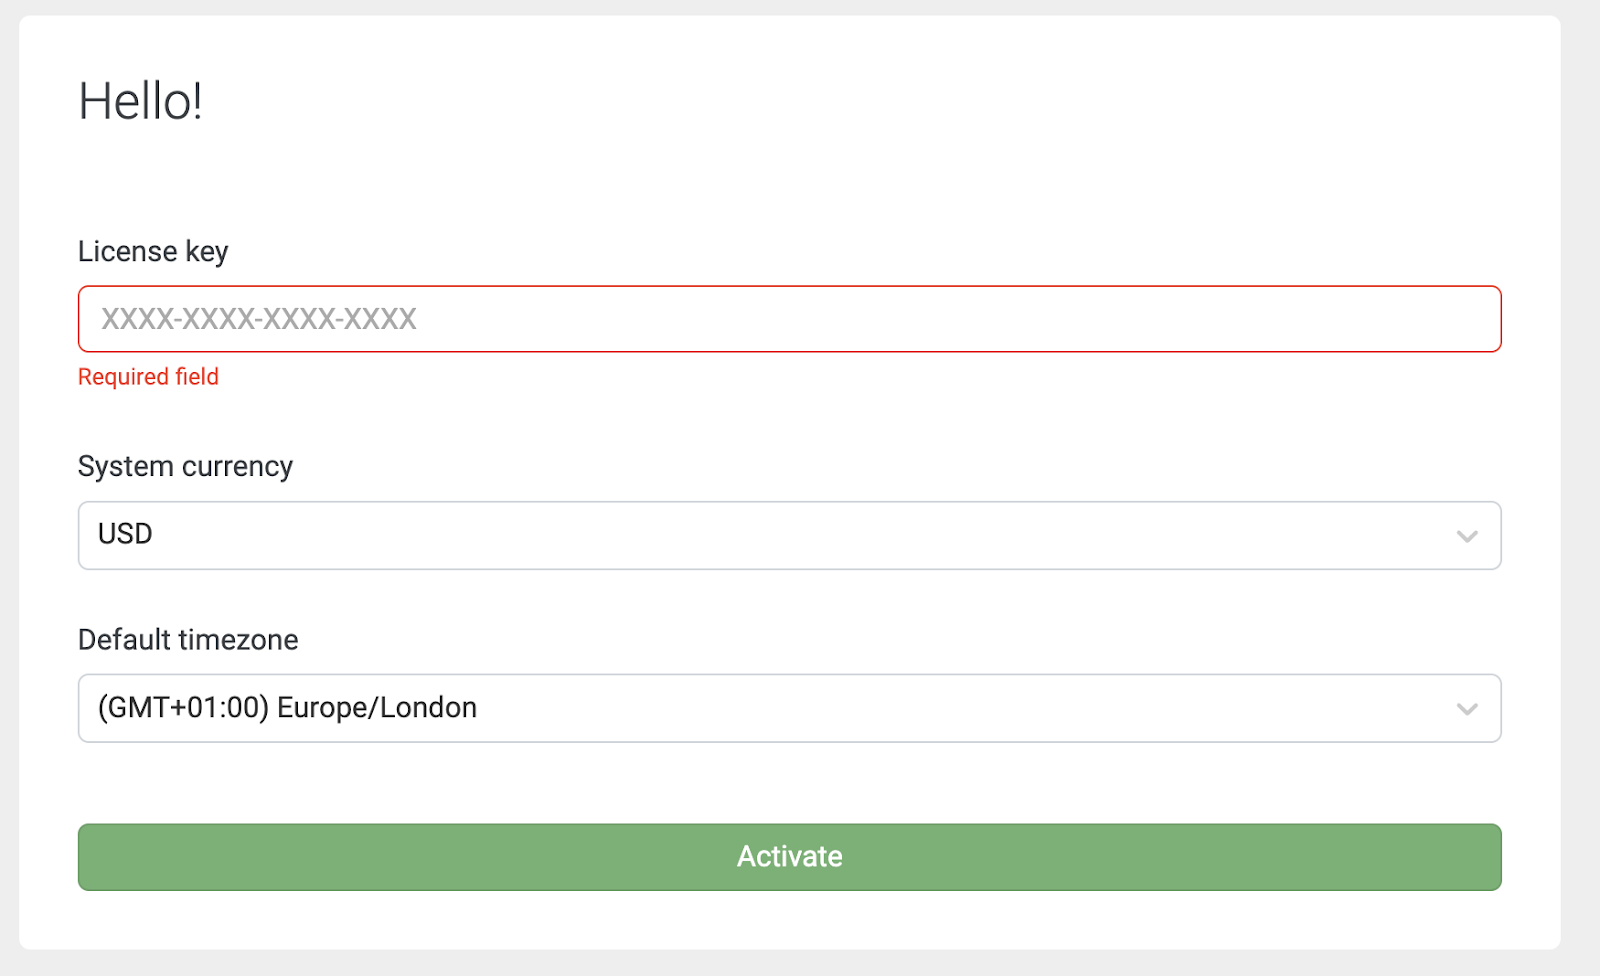
- Enter Initial Settings:
- License Key: Paste the license key from your Keitaro email.
- System Currency: Choose your preferred currency for tracking financial data.
- Default Language: Select the language for new users.
- Timezone: Set the timezone for accurate data reporting.
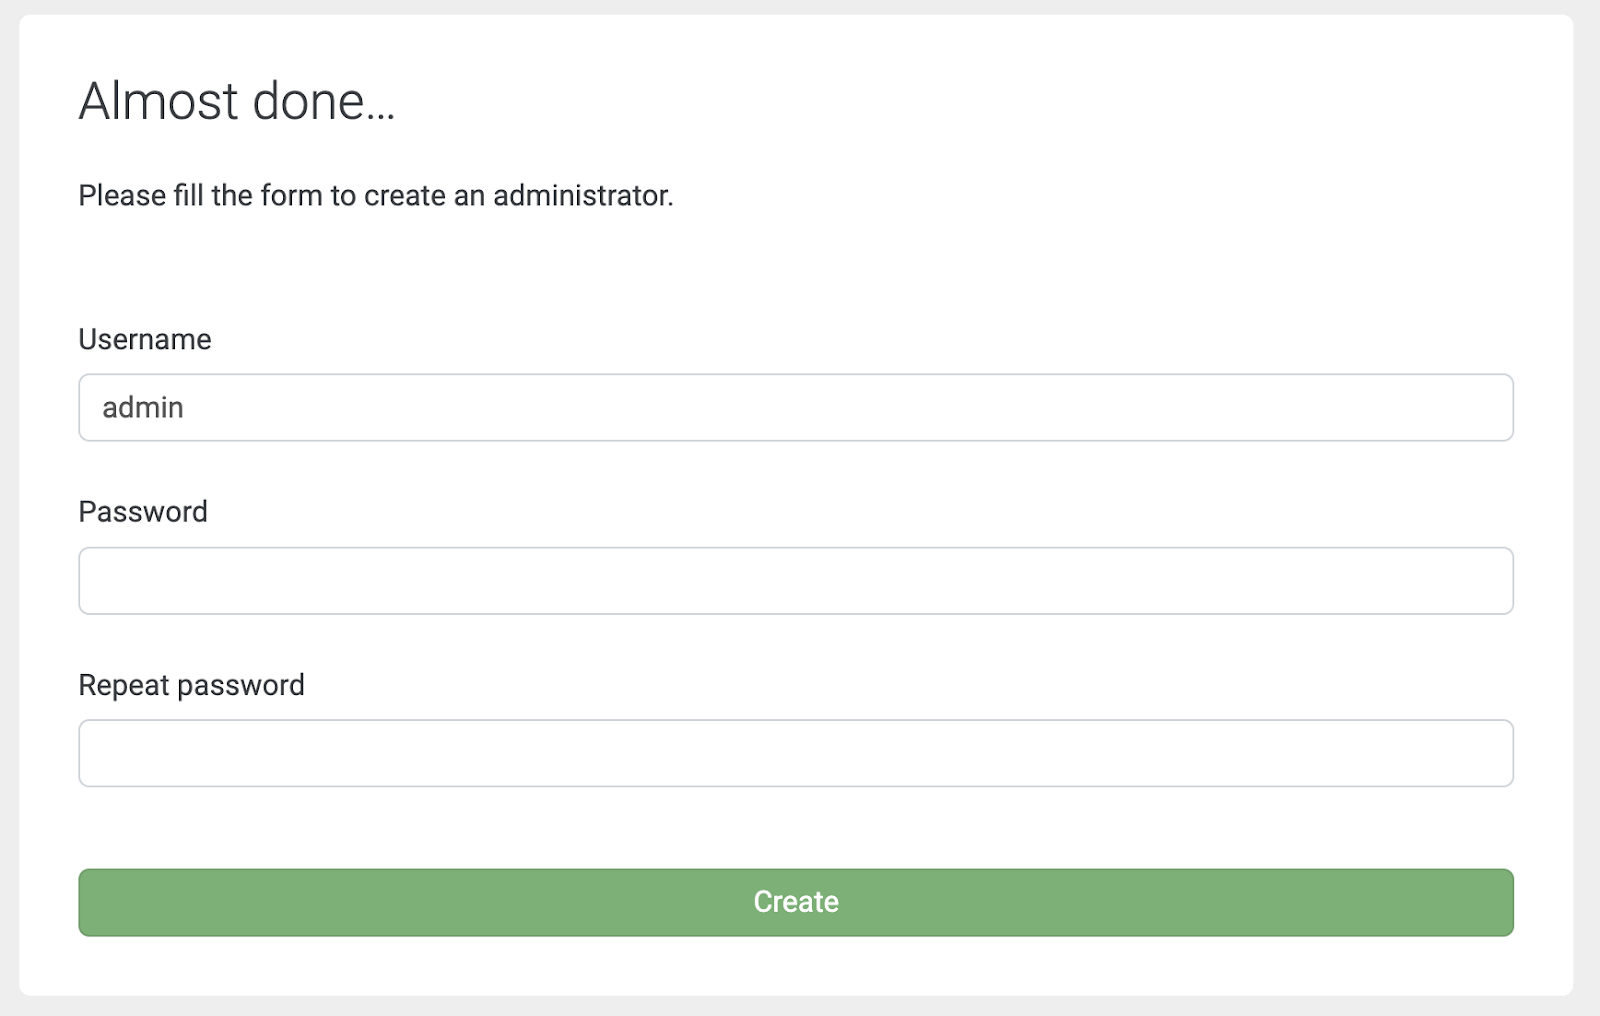
- Create an Admin Account: Enter your username and create a secure password.
That’s it! Keitaro is now ready to use.
Step 4: Connecting HilltopAds to Keitaro
Integrating HilltopAds as a traffic source in Keitaro is straightforward:
- Navigate to Traffic Sources: In the Keitaro dashboard, go to the “Traffic Sources” tab and click “Create”.
- Select HilltopAds Template: Type “HilltopAds” in the search field and choose the pre-made template.
- If necessary, adjust the parameters.
- Save the Traffic Source.
Note! The postback link contains such an important parameter as adviser ID, which must be filled with your unique ID. You can find it in the Trackers section.
Advanced HilltopAds Parameters
- {{geo}} – ISO country code;
- {{adid}} – Ad/banner identifier;
- {{zoneid}} – Traffic source identifier;
- {{campaignid}} – Campaign identifier;
- {{lang}} – Visitor language HTTP_ACCEPT_LANGUAGE e.g. en-en;
- {{category}} – Category Adult/Mainstream;
- {{cpmbid}} – CPM rate for campaign;
- {{price}} – For CPM campaigns this placeholder provides the price of 1 ad impression. For CPC campaigns it provides the price of 1 click on the ad;
- {{browsername}} – browser name.
Each postback link must contain the required parameters:
- {{token}} – Unique id of the conversion;
- {{price}} – Conversion cost;
- {{currency}} – Conversion currancy;
- advertiserID – Advertiser ID.
Step 5: Adding Domains and Finalizing Setup
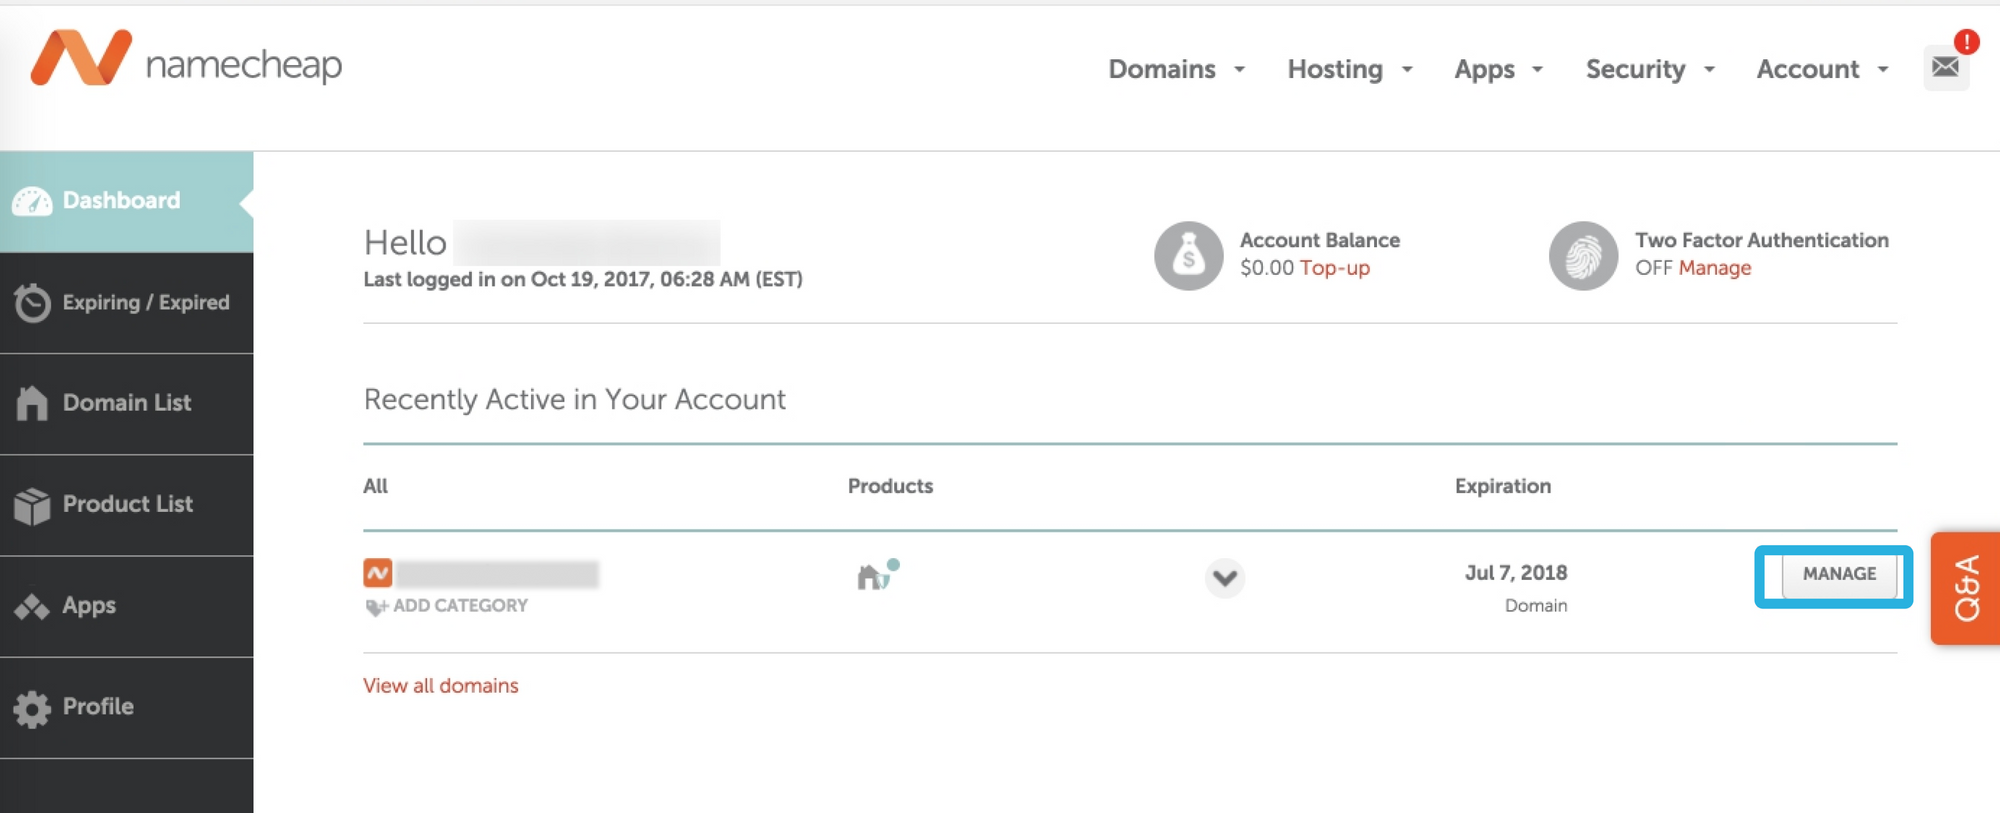
To run campaigns in Keitaro, you must add a domain. Here’s how:
- Register a Domain: Use a service like NameCheap.
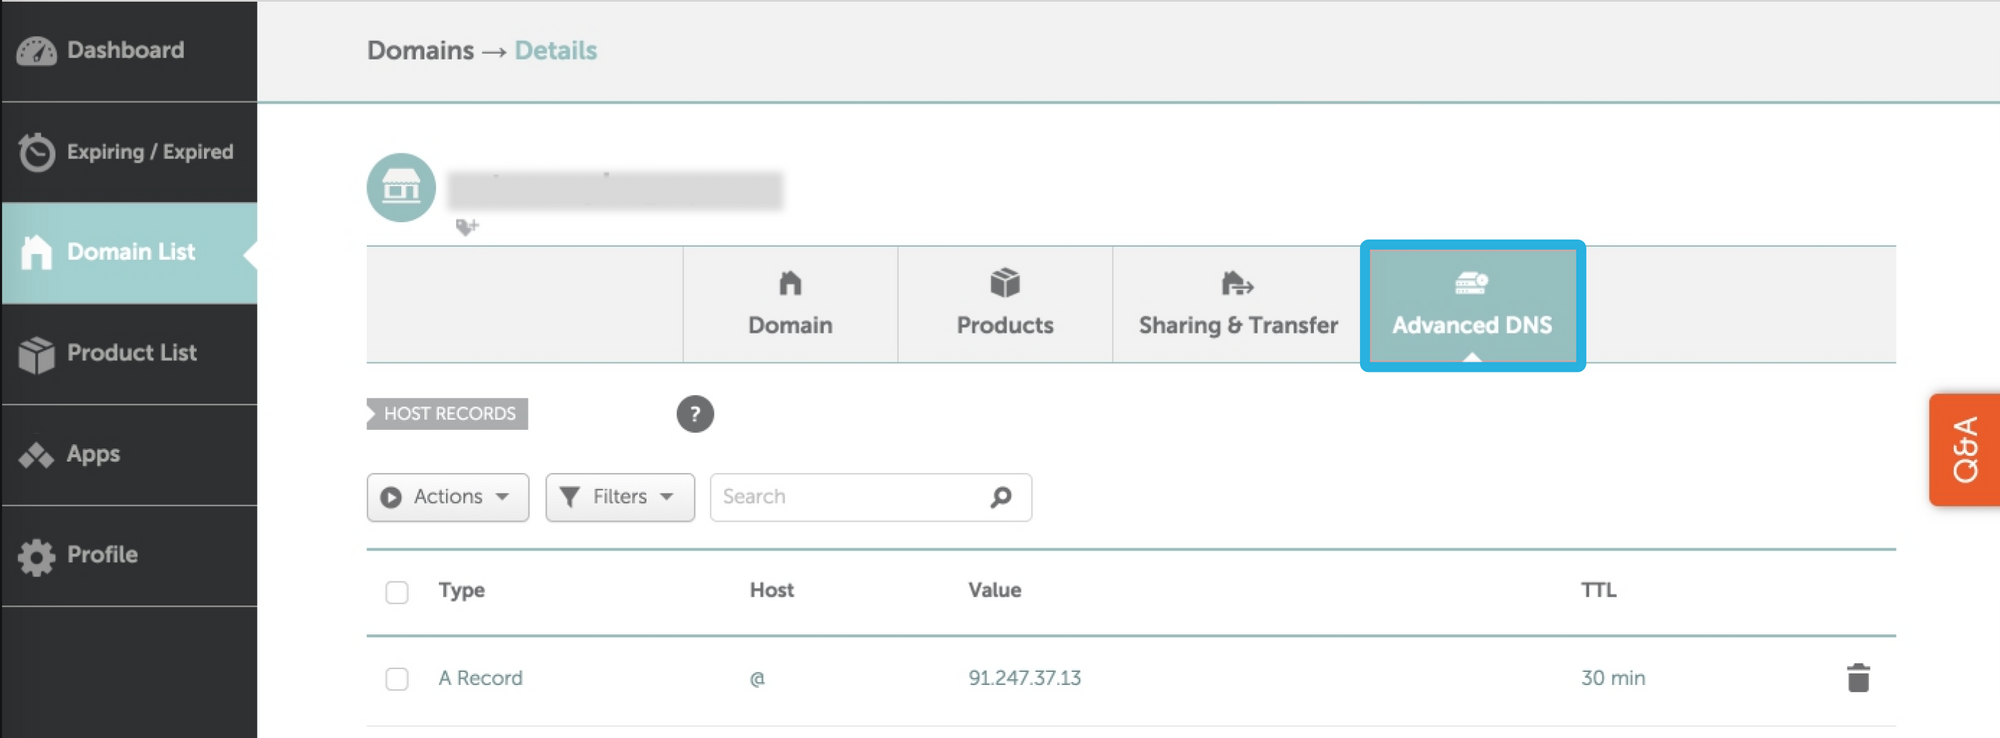
- Update DNS Settings:
- Add an A-record with the following:
- Host: @
- Value: Your server IP address.
- TTL: Lowest value available.
- Add an A-record with the following:
- Add Domain to Keitaro:
- Navigate to the “Domains” tab in the Keitaro dashboard.
- Click “Add” and enter your domain name.
Step 6: Creating Your First Campaign
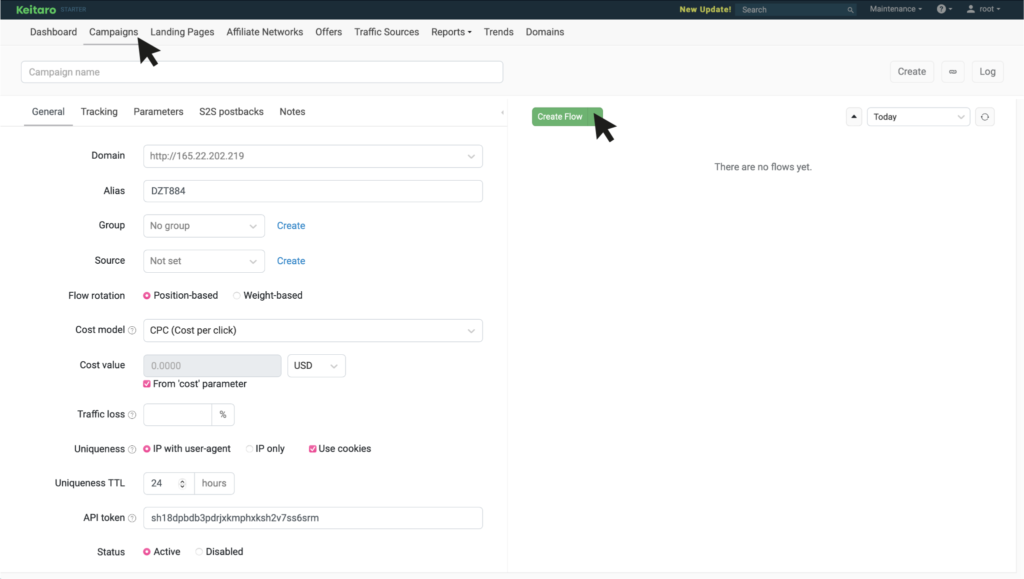
- Go to Campaigns: In the Keitaro dashboard, navigate to the “Campaigns” section and click “Create”.
- Configure Campaign Settings:
- Name: Enter a descriptive campaign name.
- Traffic Source: Select HilltopAds.
- Flow Destination: Add your offers or landing pages.
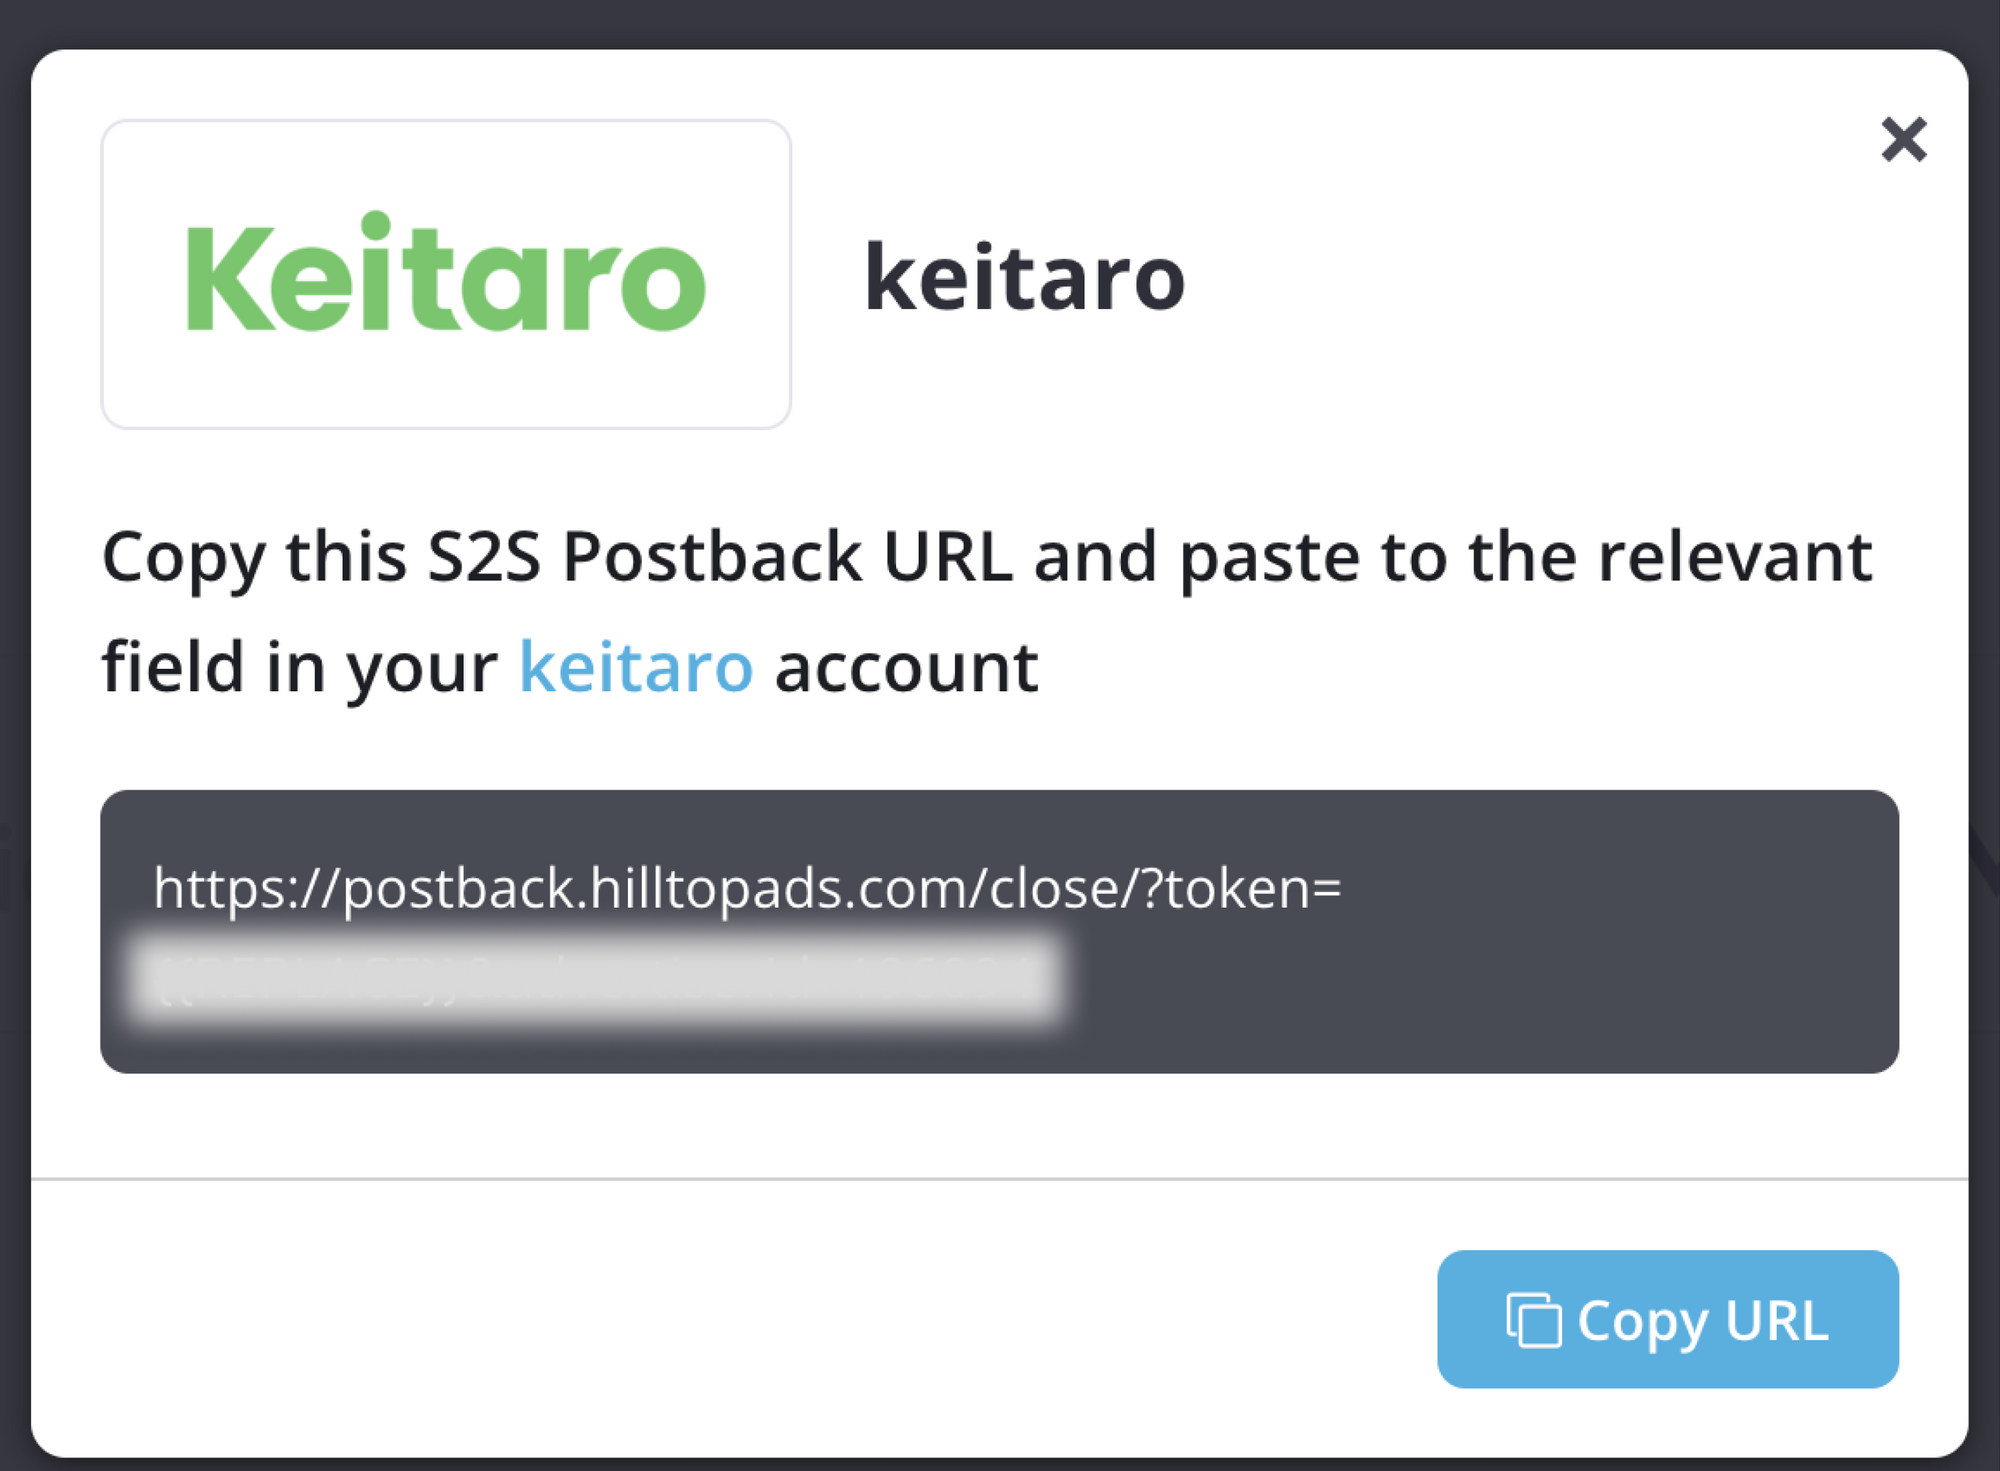
- Set Up S2S Postback: Retrieve your unique postback URL from HilltopAds and add it to Keitaro for accurate conversion tracking.
Beyond Basics
This guide covers the essentials of integrating Keitaro with HilltopAds, but it’s just the beginning. Explore other features of both platforms to enhance your campaigns further. If Keitaro doesn’t meet your needs, check out other tracker comparisons on our blog.
Stay tuned for more insights and tools to grow your affiliate marketing business. Let’s scale together!


